Want to make burnt ends but don’t have a smoker? Don’t fret! Burnt ends can be made either on your grill or in your oven, no 10-hour smoke session is required!
Burnt ends are a crowd favorite. Not only are they fairly inexpensive as far as smoked meat goes, but they are also insanely tasty and can be dressed in different sauces to suit every pallet!
If you don’t have a smoker, you might think that burnt ends aren’t an option for you, but this couldn’t be further from the truth. Read on to learn 2 different methods for making burnt ends WITHOUT a smoker!
Jump to Section
What Are Burnt Ends?
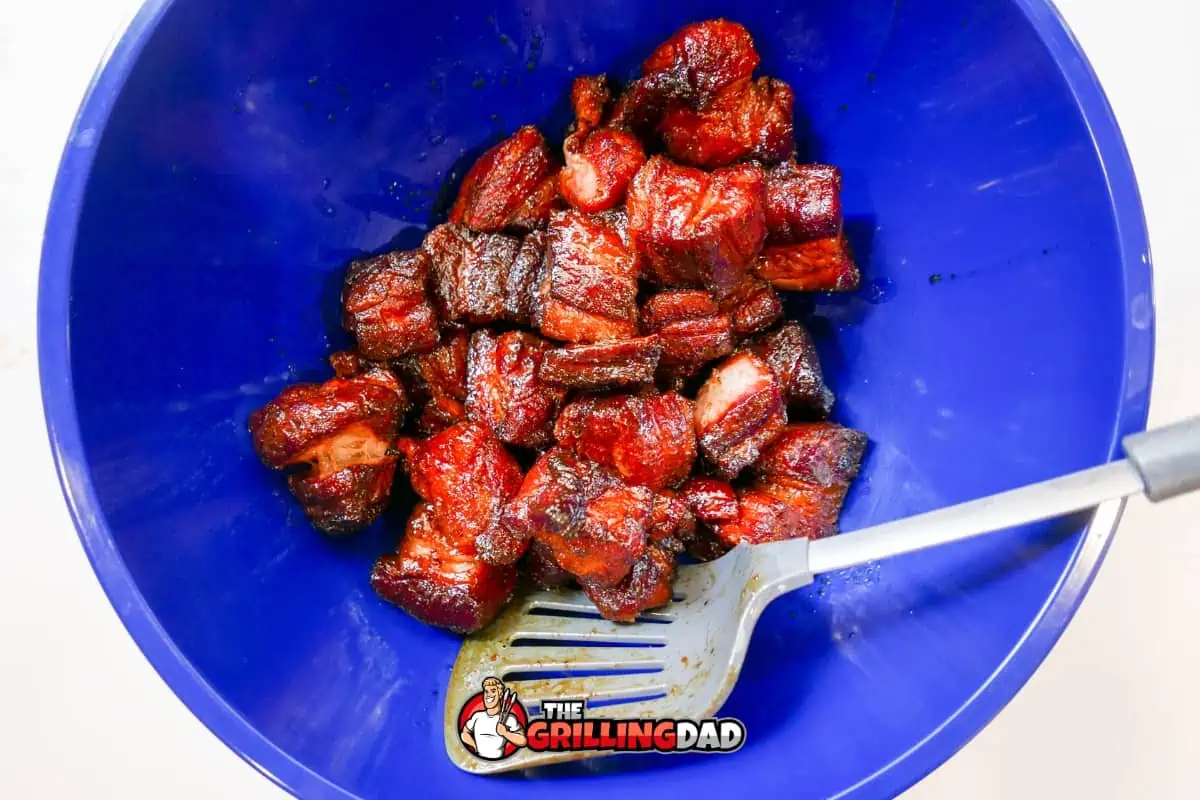
Burnt ends got their name because they are literally the burnt ends of a cut of brisket. However, they have become so popular in recent years that many people want to enjoy burnt ends without having to make a brisket.
Burnt ends are always beef, and they are usually the crispy and fatty portion of the brisket. While their name does include the word “burnt,” it’s important to know that they aren’t truly burnt. Burnt ends are simply a bit overcooked on the outside, but they can still be tender and delicious on the inside.
Can You Make Burnt Ends Without a Smoker?
While true burnt ends require a smoker to make them perfectly crispy and smoke-flavored, it is possible to make a variation without your smoker. Not only does this mean everyone can enjoy burnt ends, but making them without a smoker is also a bit quicker, so you don’t need to plan for a 10-hour cook.
While it is possible to make burnt ends without a smoker, it is important to note that you may be missing that smoky flavor. Adding liquid smoke to the recipe can help make up for this, but liquid smoke does taste different than true wood or charcoal smoke.
The two options for making burnt ends without a smoker include using an oven or using your grill. We will cover both of these methods below!
How to Make Burnt Ends Without Using a Smoker
Before you can make your burnt ends, you will need to gather the ingredients. The most important of which is the beef, which is usually a point cut of a brisket. The easiest way to get burnt ends meat is by asking your local butcher, though sometimes large grocery stores do offer brisket meat.
Additionally, if you are on a budget, you can make what is known as poor man’s burn ends using chuck roast. If you aren’t planning to smoke your burnt ends anyway, chuck roast will make an excellent replacement and help cut down on your cooking time.
After buying your meat, it’s time to gather the rest of the ingredients.
Burnt Ends Ingredients:
- Olive oil
- Brown sugar
- Garlic powder
- Onion powder
- Ground black pepper
- Salt
- Smoked paprika.
- BBQ sauce of your choice (when in doubt, use classic BBQ)
- Optional: Liquid smoke (mix with your BBQ sauce)
Besides the BBQ, all the other spices will be mixed together to create a rub for your meat. This rub isn’t a hard and fast rule, however, and you can make adjustments based on your personal preference. For example, some grillers prefer to add chili powder to make their burnt ends have a little kick, and some like to add vinegar to make theirs a little sour.
Feel free to test out a few different spice mixes until you find one you like best!
After you have mixed together the spices and olive oil, apply it liberally to your chuck roast or brisket and let them marinate for at least 15 minutes.
Once this is done, it’s time to cook!
Cooking Burnt Ends on a Grill
Have a grill but not a smoker? Follow these directions to make a tasty batch of burnt ends.
1. Preheat your grill to 300°F.
2. Cut the marinated meat into bite-size pieces.
3. Place your meat on the grill. If the grate is too large and pieces are able to fall through, use a grilling tray or metal pan.
4. Grill your meat for about 45 minutes or until the internal temperature is 165°F.
5. Take the meat off the grill and toss it in the BBQ sauce of your choice.
6. Place the meat in a grill-safe pan and cover it before putting it back on the hot grill for 15 to 20 minutes.
7. Remove the pan from the grill and let the meat rest for 10 minutes before serving.
Making Burnt Ends in the Oven
If you don’t have a grill or a smoker, you can still enjoy burnt ends! Here’s our oven burnt ends directions.
1. Preheat the oven to 275°F.
2. Place the whole brisket in a roasting tray.
3. Roast the brisket for 3 hours.
4. Remove the brisket from the oven and let it rest for a few minutes while you increase the oven temperature to 410°F.
5. Cut the brisket into bite-size chunks in the roasting tray and toss in your BBQ sauce.
6. Return the cut brisket to the oven and cook for 30 minutes, stirring every 5-10 minutes.
7. Ensure the meat reaches an internal temperature of 165°F before removing from the oven.
8. Allow the burnt ends to rest for 10 minutes, then serve.
Extra Tips
It can take a little practice to make good burnt ends, but we have a few tips to help you along!
- Rub the oil on the brisket before the seasoning rub—this will help increase the smoke flavor in the meat!
- For good bark, always use a dry rub that contains brown sugar.
- Cook for temperature—not time.
- Buy the best quality of meat you can afford. The better the meat you start with, the better the final result!
Serving Burnt Ends
Are your burnt ends currently cooking in the oven? Let’s take a look at some of the sides you can enjoy with them when they are ready!
Remember to always serve burnt ends with some extra BBQ sauce for dipping!
- Coleslaw
- Corn on the cob
- Potato Salad
- Macaroni Salad
- Smoked Mac n Cheese
- Baked Beans
- Collard greens
- Cornbread
- Baked potatoes
- Mashed potatoes and gravy
- Steamed broccoli
Burnt Ends FAQ
What cut of meat is best for burnt ends?
The best cut of meat for burnt ends is the point of a brisket. If you don’t have access to a brisket, though, you can get similar results when using a chuck roast.
Can you cook burnt ends in a pan?
While cooking burnt ends directly on the grill or smoker, cooking on the grate is recommended, it is possible to cook them in an aluminum grill pan or on a grill mat if you are worried the pieces will fall through the grate.
What is poor man’s brisket?
Poor man’s brisket is a chuck roast that is prepared using the same method used to make burnt ends, but the meat is a fraction of the price of brisket.
Do you cook burnt ends covered or uncovered?
We recommend cooking your burnt ends uncovered for the best results.

Ingredients
Method
- Preheat the oven to 275°F.
- Place the meat in a roasting tray.
- Brush meat with olive oil.
- Mix all of the seasonings together and rub generously on all sides of the meat.
- Allow the meat to rest for 15 minutes.
- Place in the oven and cook for 3 hours.
- Remove the meat from the oven and allow it to rest for 15 minutes.
- Set the oven to 410°F.
- Chop the meat into bite-size chunks.
- Return the burnt ends to the pan and toss with BBQ sauce.
- Place the pan back in the oven and cook for 30 minutes, stirring every 10 minutes.
- Check to ensure the internal temperature is above 165°F before removing the burnt ends from the oven.
- Allow the meat to rest for 10 minutes, and then serve.


