Are you wondering how you can reheat those leftover ribs without completely ruining them?
You’re in the right place!
In this TheGrillingDad.com guide, you’ll learn:
- A few different ways you can reheat them
- How long they can stay in the fridge
- The best way to reheat ribs and keep them moist
- And much more!
We’ve all experienced it.
You lay out a spread of burgers and slabs of ribs that can draw an entire pride of lions. Surely enough, your family and guests feast on your grilled masterpieces.
However, at the end of the festivities, notice something — a lot of things, actually.
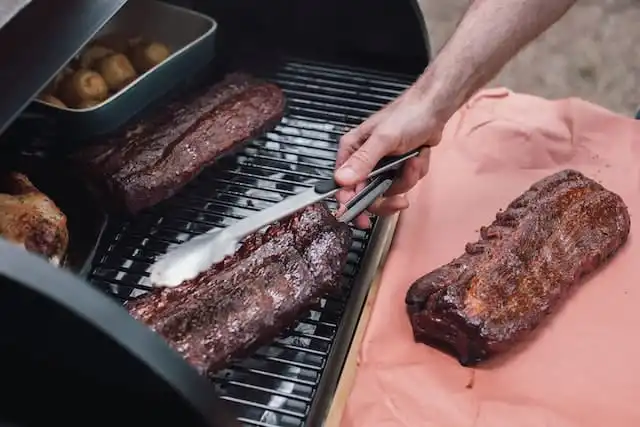
More specifically, you notice a mountain of leftover ribs on your grill.
Sure, it’s tempting to just throw these away or compost them. But, rarely is anything more shameful than wasted ribs.
In an attempt to salvage the meat, you turn to one option — you want to reheat them.
Reheating ribs, or any food for that matter, is a simple way to address your leftover problem.
However, there’s an art and science to breathing new life into your leftover ribs. If you’re not careful, your efforts might leave a bad taste in your mouth — figuratively and literally.
Want to know how you can reheat your ribs the right way? Then stick around, grab a cold one, and read on!
Read More >> Ribs on the Grill (5 Easy Steps)
Jump to Section
What Do I Do With Leftover Ribs?
The USDA’s Food Inspection Service recommends immediate refrigeration of your leftover ribs.
According to current USDA guidelines, you should throw your ribs in the fridge as soon as you can after you have taken them off the rack or grill.
If you’ve properly stored them, eating leftover ribs is almost as good as eating them fresh off the BBQ!
How Long Before I Refrigerate Leftover Ribs?
You have a window of about two hours to refrigerate your leftover ribs. Leave them out for too long, and your meat will no longer be safe for consumption.
During the two-hour window, your best bet would be to cut up the leftover ribs into smaller chunks.
This will ensure the best results for meat storage. It’ll also take a lot of the work out of cooking.
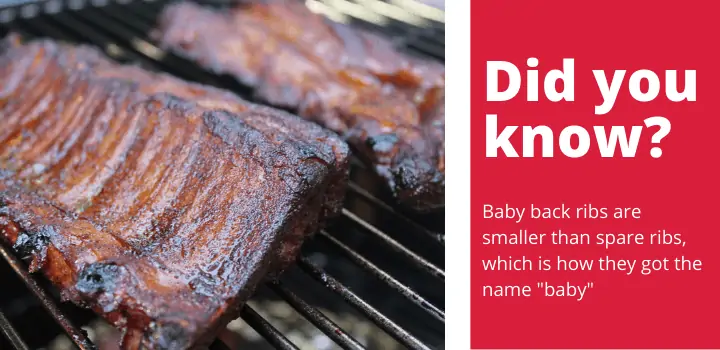
Read More >>Baby Back Ribs Vs Spare Ribs – What’s the difference?
Can You Eat Cold Ribs?
If you smoke your ribs to an internal temperature of at least 145ºF and store them properly, you could take them out of the fridge and safely eat them cold if you’d like.
There’s no law against it. I wouldn’t personally enjoy eating them cold, but there’s nothing wrong with doing it if that’s your thing!
How Long Do Cooked Ribs Last in The Fridge?
Leftover cooked ribs will last about 3-4 days in the fridge. If you can’t eat them in that time, freeze them and they’ll last about 3 months.

How To Reheat Ribs in an Oven
Let’s start with reheating your leftover ribs in an oven. Reheating your ribs in the oven can be a great option if you:
- Want to keep the ribs moist
- Want to retain the smokiness of your leftover ribs
Best Way Of Reheating Ribs:
- Preheat the oven to 250˚F.
- Add more sauce to the ribs.
- Cover the ribs in foil.
- Let the wrapped leftover ribs cook to 145ºF.
- Cook unwrapped for 10 minutes.
Step 1: Preheat The Oven To 250˚F
To maintain the moisture and juiciness of your ribs, you need to preheat your oven to the right temperature.
There are different opinions, but the USDA recommends an oven temperature of between 250˚F and 325 °F.
You don’t want to risk drying them out, so stick to a low and slow 250ºF.
Step 2: Add More Sauce to the Ribs
While preheating the oven, you can add more sauce to your leftover ribs.
Adding another layer of sauce prevents the ribs from drying out after they have been baked in the oven.
Step 3: Cover the Ribs in Foil
Wrap the ribs in foil. I recommend double wrapping in heavy-duty aluminum foil so the moisture stays in and keeps the ribs nice and juicy.
Then, place the wrapped ribs on a pan so that you don’t burn yourself when taking them out of the oven.
Wrapping the ribs in foil will allow the ribs to cook evenly inside the oven. This is important since unevenly cooked portions may have microorganisms.
Evening out the oven’s heat will kill microbes and cook the ribs to your desired taste.
Step 4: Let the Wrapped Leftover Ribs Cook to 145ºF
The USDA recommends that the internal temperature of meat be 145 degrees Fahrenheit.
This is the temperature that kills off most bacteria.
During this step, checking on the meat’s temperature is key. This is why you will need a meat thermometer.
This step will take about 20-30 minutes.
Step 5: Cook Unwrapped for 10 Minutes
Unwrapping the ribs will allow the sauce you added to consolidate.
Caramelized sauce leaves you with that sweet and smokey taste you’re reheating the ribs for.
Since the meat will no longer be in foil, don’t risk burning them and keep them in for a maximum of 10 minutes.
Read More >> Best Dry Rubs For Ribs
How To Reheat Ribs in the Air Fryer
Eager to throw your leftover ribs into a frying pan? Hold your horses!
Cooked meat that you have just refrigerated will end up hardening and drying up on a frying pan.
To fry your ribs, you’ll need an air fryer.
An air fryer will ensure that your ribs come out with nice outer crusting that’ll leave you wanting more.
The steps to frying leftover ribs are:
- Preheat the air fryer to 350°F
- Cutt up your leftover ribs
- Add oil
- Air fry your leftover ribs for 5-8 minutes
Step 1: Preheat the Air Fryer to 350°F
We recommend this temperature based on current USDA guidelines.
A temperature of 350 degrees Fahrenheit kills nearly all microorganisms and makes red meat safe for consumption.
Step 2: Cut Up the Ribs
Cutting up the ribs makes things easier on your jaws and your air fryer.
Smaller chunks of meat fry faster on an air fryer than larger chunks.
Step 3: Add Oil to Your Leftover Ribs
This isn’t always a must-do. If you’re particular about juiciness, a little more oil can’t hurt.
After you’ve sliced the ribs, add a teaspoon (or two) of oil.
Step 4: Wait Until the Ribs Cook
You’ll be surprised at how quickly an air fryer reheats sliced-up ribs.
You wouldn’t want to leave the rubs in the fryer as you would if they were in the oven.
A good rule of thumb would be waiting for about 5-8 minutes.
Read More >> 321 Ribs Smoked Ribs
How to Steam Ribs
Steaming food has the following benefits:
- It’s easy.
- It’s healthier.
- The food retains its moisture and nutritional value.
So, if you want your leftover ribs to retain their protein and not give you heart attacks down the road, follow these steps:
- Boil your broth
- Place the ribs on a steaming basket above the broth
- Let the meat steam for 30 minutes
- Take out the ribs and pour the broth on them
Step 1: Boil Your Broth
In a steaming pot, boil a broth. The broth will provide moisture to your ribs and helps prevent them from drying out.
For flavor, you have a couple of choices. We love using fruit juices like apple or orange juice. If you’re really into the fancy stuff, we recommend ale if you’ve got some lying around.
Step 2: Place the Ribs on a Steamer Basket
Once your broth starts to boil, place the ribs on a steamer basket.
Place the steamer basket above the broth.
Step 3: Let the Ribs Steam For 30 Minutes
At the very least, let the broth infuse into the ribs for half an hour.
If you want your ribs really juicy, we suggest letting the ribs boil for 45 minutes.
Step 4: Pour the Remainder of the Broth
Once your bbq pork ribs have steamed nicely, take what’s left of the broth and pour it on the ribs.
This will add more juiciness and flavor to your steamed ribs.
Read More >> Best Woods For Smoking Ribs
Can You Microwave Leftover Ribs?
You can absolutely microwave leftover ribs. While they won’t have the same crispy outside as they did during the original cooking, they can still be delicious. With our special GrillingDad method, where you wrap them in a paper towel, you can make your leftover ribs pretty tasty!
Microwaving Your Leftover Ribs the Grilling Dad Way
Easy as it seems, microwaving ribs is easy to mess up.
A microwave oven can easily dry up meat.
So, a sticking point is always cooking the meat quickly and easily but retaining the moisture.
We’ve figured out that it is possible to microwave cooked ribs and retain much of the juiciness and moisture.
All you need to do are these easy steps:
- Slice up your ribs.
- Place the ribs in between two damp paper towels.
- Microwave the ribs until they reach 145 °F.
Step 1: Slice Up the Ribs
Once again, this will allow the ribs to cook faster and more evenly.
Step 2: Place the Ribs in Between Two Damp Paper Towels
Damp paper towels will allow the ribs to absorb some moisture. You can wet the paper towels with water.
If you’re after a bit more flavor, you can wet the paper towels in your marinade or beer if you’ve got any left from your last barbecue.
Step 3: Microwave the Ribs to the Desired Temperature
A temperature of 145 °F is the internal temperature you’re after.
So, you’ll have to check your meat’s temperature using your meat thermometer.
Don’t assume that your ribs are cooked if you see steam. Internal temperature is still the best way to determine how well your meat was cooked.
Don’t flirt with danger by consuming undercooked ribs.
How Do You Reheat Ribs And Keep Them Moist?
- Preheat the oven to 250˚F.
- Add more sauce to the ribs to keep them moist.
- Cover the ribs in foil to prevent them from drying out.
- Let the wrapped leftover ribs cook to 145ºF.
- Cook unwrapped for 10 minutes.
How Long Do You Reheat Baby Back Ribs in the Oven?
If your oven is set to 250ºF, you’ll reheat the baby back ribs for about 25 minutes before they reach a safe internal temperature of 145ºF.
How long you warm them up is dependent upon the size and the number of ribs you have in the oven.
Final Thoughts: Reheated Ribs Can Still Taste Great!
If there’s one thing we wanted to establish in this guide, it’s that reheating grilled ribs doesn’t have to result in rubbery and bland meat.
By following The Grilling Dad guide to reheating ribs, not only will your reheated ribs taste great — they’ll also be healthy, juicy, and most importantly safe.
Go ahead and reheat your ribs. It’d be a shame for them to go to waste, after all!
Drop a comment below and let us know which method you used and how they turned out!
Learn More About Grilling
If you want to learn more about grilling, check out these other helpful resources!


